Flutter Install Guide
Provided by Jonathan YatacoIf you're participating in our Flutter workshops, you will need to have Flutter installed prior to the start of the event.
We've put together some instructions to help get you started, but note that this information serves as a supplement to the installation instructions found on the official Flutter website.
For the full official instructions, navigate to flutter.dev/docs/get-started
Introduction
NOTE: This document serves as a supplement to the installation instructions that are found on the flutter website. Flutter is available to install on all major operating systems and the official instructions for installing it on each OS can be found here:
This document will only go over instructions for installing Flutter on Windows and Mac OS. Both documents will only cover setting up Flutter for use with emulators. For instructions on how to deploy a Flutter app to your actual iOS/Android device, please refer to the official installation guides. Again this document is a supplementary reference to the official guides.
After following the official instructions or the supplementary references, you can set up a text editor that will be used for flutter development. Instructions on how to set up a text editor/IDE can be found here. Both Android Studio and Visual Studio Code can be used for Flutter development and both have great Flutter/Dart plugins to support your development environment.
If you have any questions during installation, post your question on the #tech-help channel of our official Discord server https://go.dscfau.com/discord. Thanks 👨🏽💻
- Windows Official Installation Guide
- MacOS Official Installation Guide
- Linux Official Installation Guide
This document will only go over instructions for installing Flutter on Windows and Mac OS. Both documents will only cover setting up Flutter for use with emulators. For instructions on how to deploy a Flutter app to your actual iOS/Android device, please refer to the official installation guides. Again this document is a supplementary reference to the official guides.
After following the official instructions or the supplementary references, you can set up a text editor that will be used for flutter development. Instructions on how to set up a text editor/IDE can be found here. Both Android Studio and Visual Studio Code can be used for Flutter development and both have great Flutter/Dart plugins to support your development environment.
If you have any questions during installation, post your question on the #tech-help channel of our official Discord server https://go.dscfau.com/discord. Thanks 👨🏽💻
Windows Guide
- Operating Systems: Windows 7 SP1 or later (64-bit)
- Disk Space: 400 MB (does not include disk space for IDE/tools).
- Windows PowerShell 5.0 or newer (this is pre-installed with Windows 10)
- Git for Windows 2.x, with the Use Git from the Windows Command Prompt option.
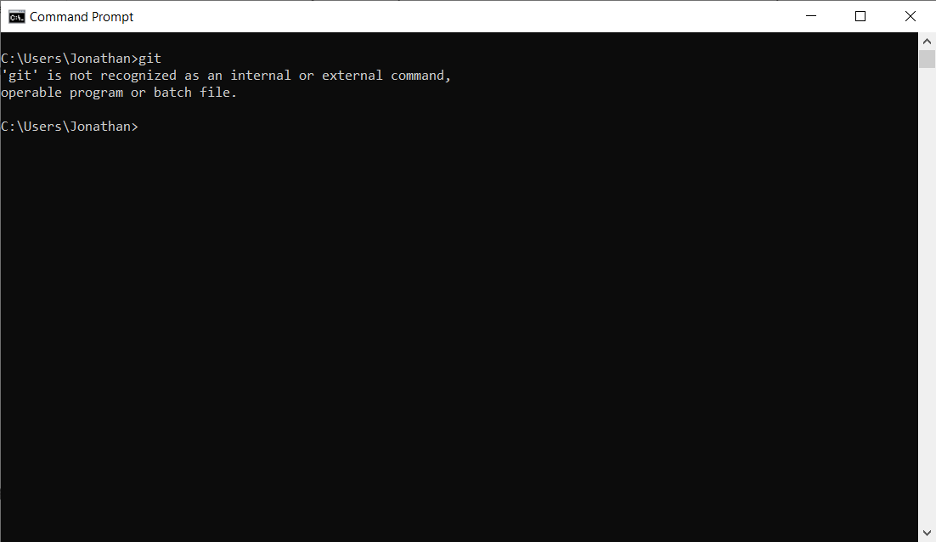
Make sure you meet these requirements before continuing. Follow the embedded links to install Windows PowerShell 5.X and Git for Windows 2.X. Windows PowerShell 5.x is already pre-installed with Windows 10, but it is especially important to download Git since that does not come pre-installed with windows. For example, if I try to run the git command on a fresh install of Windows 10 I get the following error.
Git offers a 32-bit version and a 64-bit version on the download page. It is important to download the version that corresponds to your operating system. To find out if the version of windows that you are running is 32 or 64 bit, do the following:
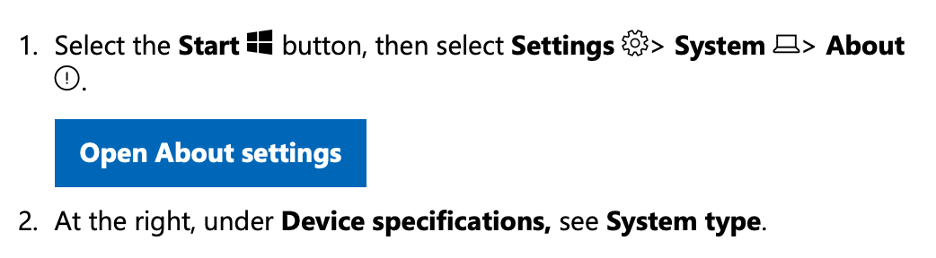
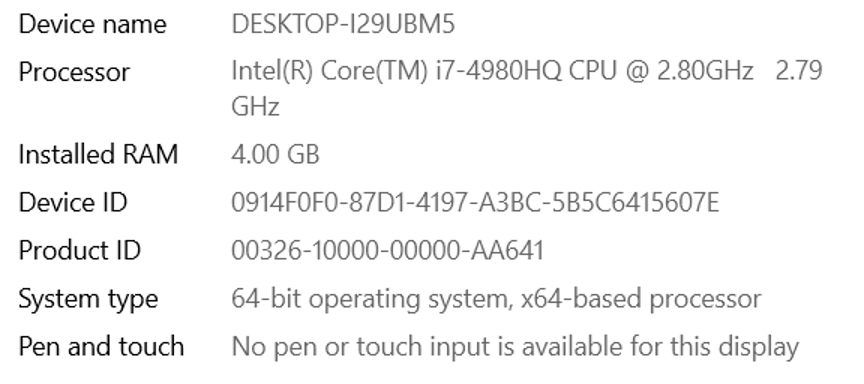
You will see this information and the System Type will either tell you if you are running 32- or 64- bit.
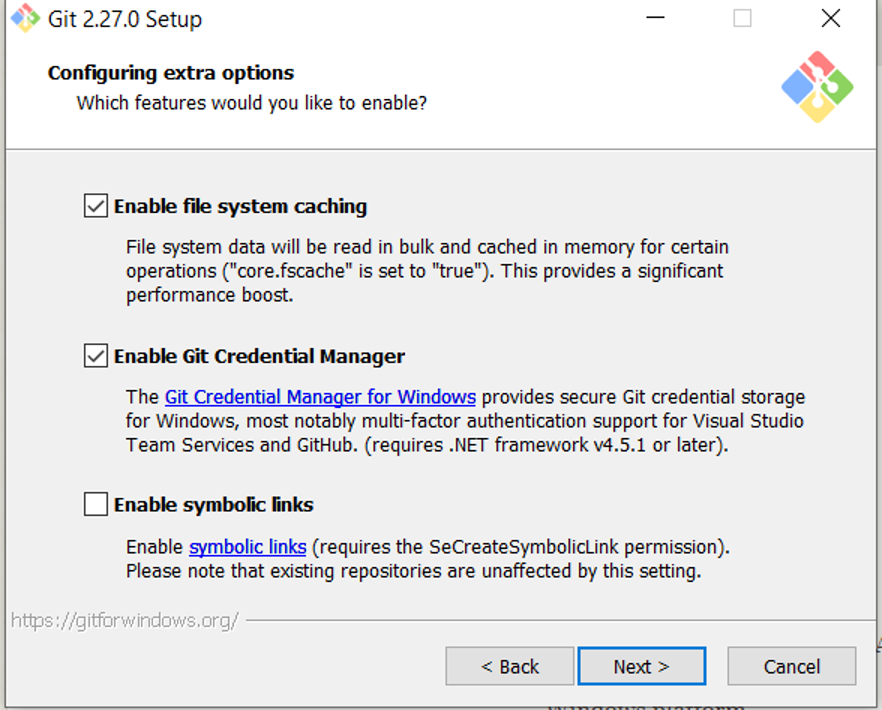
Once you have this information, download the appropriate version of git for Windows. The download will be an .exe, and when opened you will be prompted to set up git. The setup will ask you to configure git on your system but the default settings are fine for our purposes. Just keep clicking next during the setup. The following is an example of what the setup looks like:
- Download the following installation bundle to get the latest stable release of the Flutter SDK: flutter_windows_1.17.4-stable.zip
- Extract the zip file and place the contained
flutter in the desired installation location for the Flutter SDK (for example,C:\src\flutter ; do not install Flutter in a directory likeC:\Program Files\ that requires elevated privileges).- For example, I’m going to create a new folder in my C:\ drive called src. I will extract/place the Flutter SDK in here
- Once extracted, we want to update our system path so that we can use flutter commands from anywhere in the windows console, rather than just from the directory where flutter is installed.
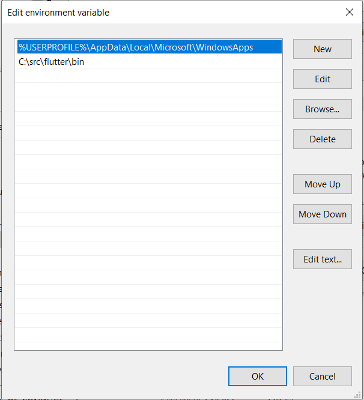
- From the Start search bar, enter ‘env’ and select Edit environment variables for your account.
- Under User variables check if there is an entry called Path:
- If the entry exists, append the full path to
flutter\bin using; as a separator from existing values. - If the entry doesn’t exist, create a new user variable named
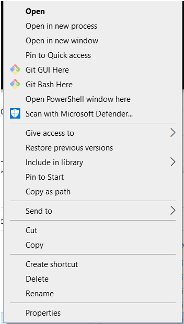
Path with the full path toflutter\bin as its value. - In order to find out the full path name of flutter\bin, navigate to the folder flutter folder inside src. Locate the bin directory and right click on the bin directory while holding down the shift key.
- You should be given the option to “copy as path”. Clicking this option will copy the full system path to flutter\bin to your system clipboard.
- You should see the “copy as path” option as shown on the right. Once clicked, follow the instructions above to add to path. Note that if the path is copied with quotation marks around it, remove them before adding to the system path. To confirm if this was successful, run flutter doctor and you should receive output in windows prompt.
- If the entry exists, append the full path to
Screenshot example of new path after editing:

Example of output from running the flutter doctor command:

Note that you can use and develop flutter apps with other IDE’s or text editors such as visual studio code. The official installation instructions as well as this document will only cover setup using Android studio, since Android studio is needed to run an Android emulator whether or not you use the IDE for editing code.
Setting up Android Studio
- Download and install Android Studio.
- Start Android Studio, and go through the 'Android Studio Setup Wizard'. This installs the latest Android SDK, Android SDK Command-line Tools, and Android SDK Build-Tools, which are required by Flutter when developing for Android. Choose the standard option during the Android Studio Setup Wizard. This will install everything that is needed.
- Enable VM acceleration on your machine. The section that explains how to enable VM acceleration will be farther down the page, and it will be titled “Configuring VM acceleration”. Note this has to be done on an actual machine, and cannot be enabled through a virtual machine running windows.
- Launch Android Studio > Tools > Android > AVD Manager and select Create Virtual Device. (The Android submenu is only present when inside an Android project.)
- Choose a device definition and select Next.
- Select one or more system images for the Android versions you want to emulate, and select Next. An x86 or x86_64 image is recommended.
- Under Emulated Performance, select Hardware - GLES 2.0 to enable hardware acceleration.
- Verify the AVD configuration is correct, and select Finish. For details on the above steps, see Managing AVDs.
- In Android Virtual Device Manager, click Run in the toolbar. The emulator starts up and displays the default canvas for your selected OS version and device.
Once this is configured, you have your windows environment setup to develop flutter apps 😃. Questions?